
A long time ago, in the days of limited bandwidth, video meant multicast; unicast video on demand was talked about as a dream but consumer broadband (or 2G/3G mobile data) rates were low. So IPTV and live streaming utilized multicast to save on bandwidth costs.
Those days are behind us now, with good quality home broadband now ubiquitous - but that doesn’t mean multicast is no longer needed. Multicast found other use cases beyond video - niches like High Frequency Trading where the stock prices feed is delivered to all traders using multicast and also in IOT based sensor and monitoring systems.
Whatever your use case may be for multicast, this post will teach you how to generate multicast traffic using Ostinato.
For source-specific multicast (SSM) testing with IGMPv3/MLDv2, see Source Specific Multicast with Ostinato.
What is multicast?
A unicast packet is destined to one and only recipient. A broadcast on the other hand is destined to all recipients/hosts on a broadcast domain (e.g. within a L2 network or a IP subnet).
Multicast is in between those two ends - it is destined to multiple recipients (more than one, but not all). A multicast IP address has the following range -
- IPv4:
224.0.0.0to239.255.255.255 - IPv6:
ff00::/8
Because there are multiple recipients for each multicast IP address, each such address is commonly called a multicast group.
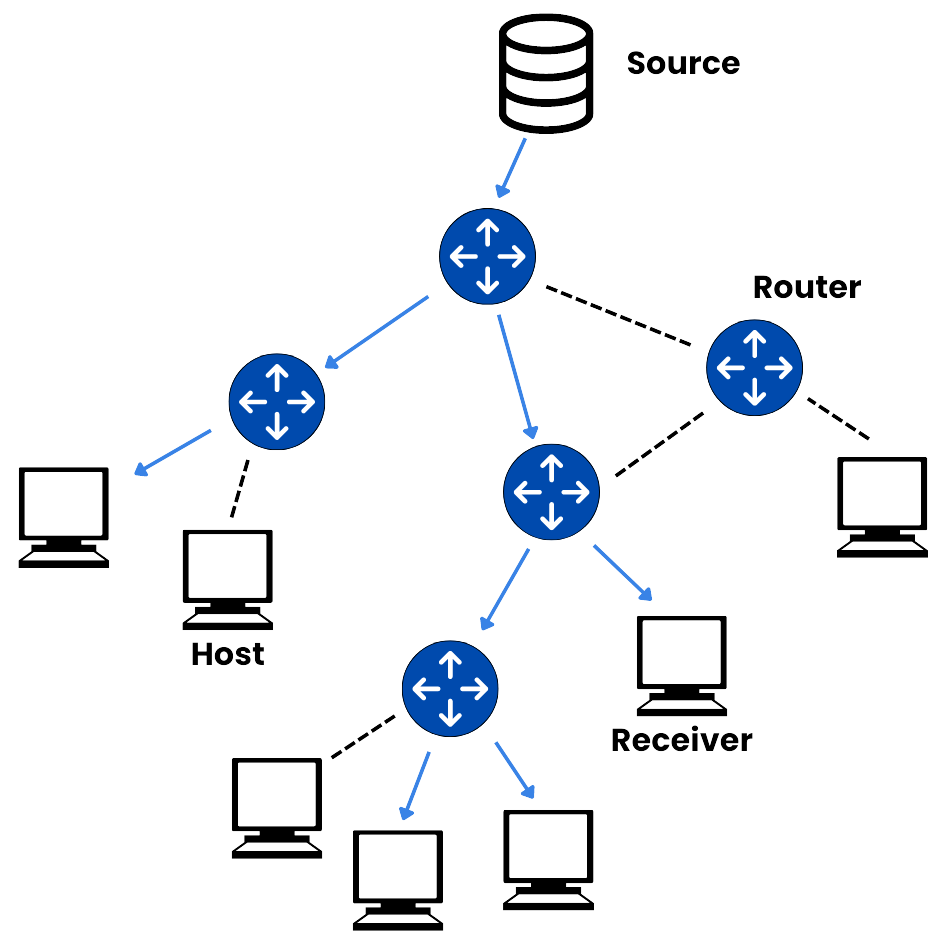
Recipients wanting to receive particular multicast group traffic explicitly signal their interest using IGMP (or MLD) join and leave messages. The routers and switches in the path between the multicast sender (also called a source) and the receiver build a list of group members for each such multicast group by snooping these IGMP and MLD messages.
When a router or switch receives traffic for a multicast group, it makes copies of that incoming packet and sends one to each member of the group.
Zooming out - the path from the multicast sender to receiver looks like a tree (the data structure)!
Why test with multicast traffic?
You can easily verify that IGMP snooping and MLD snooping build the multicast group member list correctly using the equipment vendor CLI (or other management means). But populating the member list in the control plane is not a guarantee that the data plane traffic will be sent out correctly to all recipients, especially at scale and high data rates.
Multicast on switches and routers is resource intensive because of all those different copies that need to be created for every incoming multicast packet. It is always recommended to verify the multicast tree end to end using data traffic.
How to generate multicast traffic
Crafting multicast traffic is straight-forward.
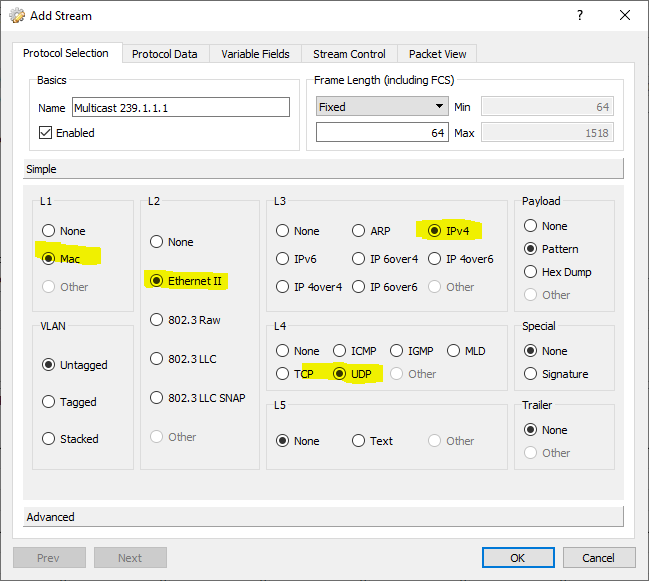
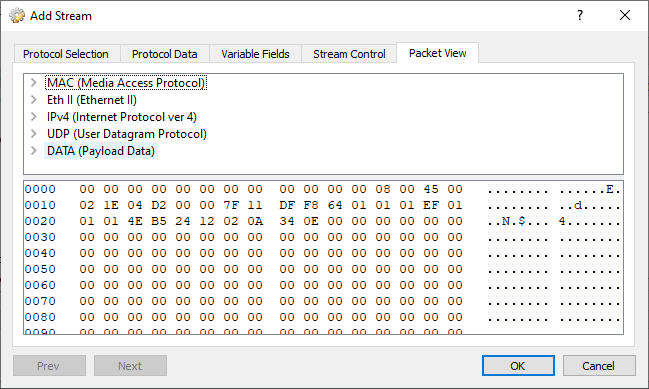
Multicast packets are typically (but not always) UDP. So, select the protocols - Mac | Ethernet | IP (v4 or v6) | UDP. Add a VLAN if you need.
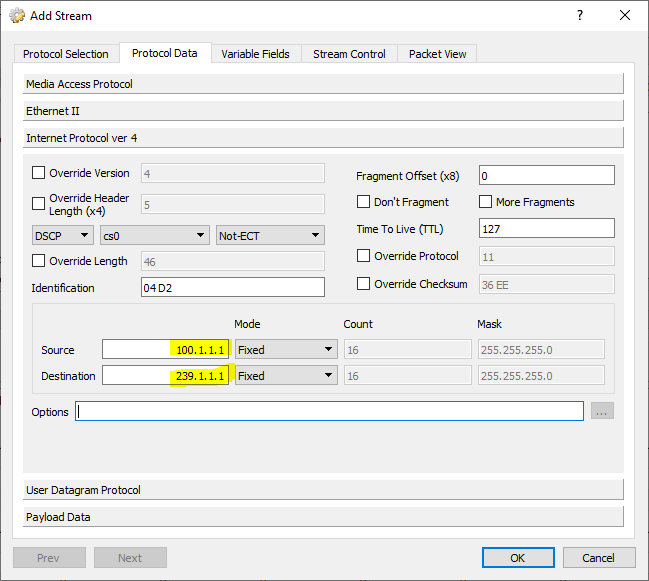
Set the source IP in the packet to the operating system assigned IP address or an emulated IP address assigned within Ostinato to the port.
Set the destination IP of the packet to a multicast IP address from the range mentioned before.
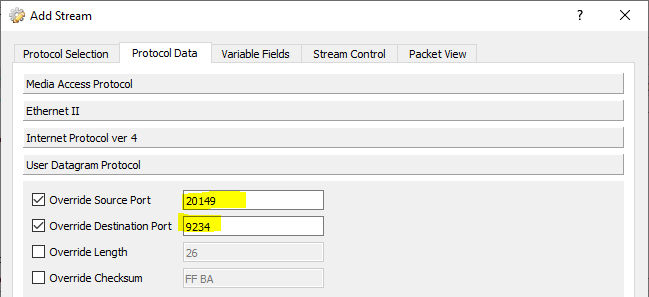
Optionally, you may choose to set the source and destination UDP ports.
Finally, change the packet size to any value between 512 and 1024 (a common packet size for multicast packets), or if your use case has a different typical packet size - use that.
That’s our multicast packet.
Finally, you should set the traffic rate that you want for your multicast stream.
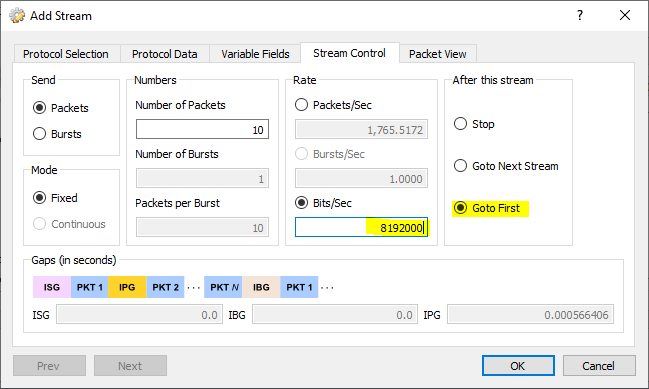
You are all set now to start sending multicast traffic!
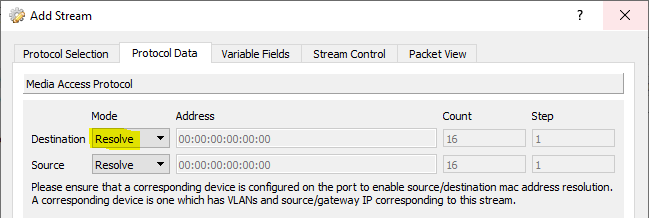
A note on the Destination MAC
Multicast IPv4 addresses used as destination IP are mapped to the destination multicast mac address range 01:00:5e:00:00:00 to 01:00:5e:7f:ff:ff. These are derived by taking the lower 23 bits of the IPv4 multicast address and mapping it into the multicast MAC address range.
IPv6 Multicast address range are mapped to multicast MAC addresses in the range 33:33:xx:xx:xx:xx, where xx:xx:xx:xx is the lower 32 bits of the IPv6 multicast address.
If you leave Destination MAC Mode at the default Resolve, Ostinato will automatically do this mapping.
Join and Leave a multicast group
Well, sending multicast data by itself is not very useful without clients or listeners.
Ostinato supports both IGMP (for IPv4 multicast traffic) and MLD (for IPv6 multicast traffic) - you can watch the video below for a demo on multicast data and IGMP using Ostinato.
Alternately, you can also use the free tool - sendigmp.
sendigmp -s 192.168.1.3 -g 225.1.1.100 v2report
report is the official nomenclature for a IGMP join.
sendigmp -s 192.168.1.3 -g 225.1.1.100 leave
Beware the default
IGMP snoop or proxy may not be enabled by default on some network devices. With no member list for a multicast group, the typical behavior in this case is to flood the multicast packet to all ports or in a few cases dropping the multicast traffic.
Traffic will still reach the recipient if an intermediate device floods multicast traffic - however, this is a highly inefficient operation and takes up significant resources in the data plane. It is recommended to enable IGMP and MLD snooping or proxy to efficiently utilize network resources.
To test that your switch’s storm control correctly limits multicast (and broadcast) traffic, see network storm test.
Video Demo
Here’s a video demo of the above steps to create multicast traffic and also how to create IGMP join/leave -